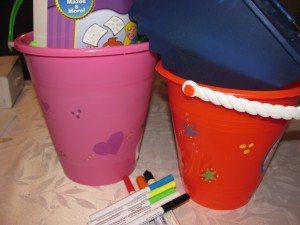
(Welcome Central Valley Today viewers! These are the details of my spot today!)
This is such an easy project that I feel kind of guilty devoting a post to it. I mean if it is something I can easily do anyone can. It doesn’t have to be perfect, I mean mine aren’t.
And full disclosure, these here in the picture aren’t mine. I couldn’t get a picture of the ones I did for my older two children without getting their names in the picture. These were done by my friend Angie for our church when my last two were born. And she decorated all sides of the buckets, I didn’t;). And hers are cuter than mine but my kids love the ones I did!
Ok, the main idea behind these personalized buckets is that you don’t have 10 million cheap baskets around the house that won’t hold anything and have to be replaced every year. With personalized buckets you have 2 choices. The kids can use them all year round to transport their things and decorate their rooms. The other option, and the one we use, is we pack them away after Easter just like you do stockings. Then pull them out and use them year after year. The ones I made are 8 years old already and still look pretty good.
The first thing to do is pick the right bucket! I picked awesome paint buckets when I did this eight years ago. They are shallow but huge! I had to get something smaller for my kids to use for egg hunting for the next couple of years. #MomFail Pick a bucket that fits the kid you are getting it for. While it looks cute to see a child lug around a bucket that is 2/3 their height, they find it very frustrating. Same thing with picking baskets that are to wide. Then they just turn and accidentally dump out everything. That makes kids not want to find all the eggs!
Now that we found the bucket we are ready to go! Wipe down the bucket with a baby wipe or cleaning wipe and let it dry completely. Then you just take your paint pens and go at it! If you want you can use templates too. They can help with basic shapes but you probably won’t get anything to detailed with the templates. Let is dry for an hour or two and you can use it! I like to let them cure for a day but it isn’t really needed.
And seriously, that is it! Now fill it with goodies or take it egg hunting! Make sure if you are egg hunting though you are looking for my perfect Easter eggs! Your kids will feel so special and you spent as little as $1 on the bucket! Such a deal!
Happy Easter!

One thought on “Personalized Easter Baskets”